Dal Paratha

Dal Paratha
Dal paratha is one of my favourites and I make it quite often. Coming from a Punjabi family, I have grown up eating parathas all my life. I love my parathas. Give me any variety of paratha with pickle or curd and I am the happiest.
Believe it or not, my mom makes the best parathas in the world. Whoever has ever tasted her parathas even once, go gaga over it.
Ever since I was a kid, I loved cooking and I have grown up watching my mom cook. Watching her prepare parathas is so therapeutic. It felt so easy to prepare while seeing her making them.
When I started to cook, my parathas never came out as good as hers. On a repetitive call, I asked her for recipes and watched her over and again making those parathas. I used to complain her, why doesn’t my parathas come out exactly as yours’s, when I follow your recipe to the T?
She then shared with me a few tips to make lip-smacking parathas. I am going to share each and every tip to help you make delicious parathas. You will never ever think of ordering parathas in a restaurant.
How to prepare for Dal Paratha –
Wash, rinse, soak and boil dal. Let it cool. Finely chop onions, coriander leaves, carom leaves (optional). Keep the required spices ready.
Which Dal to use for this recipe –
Dal paratha best taste with toor dal or mixed dal. You can also use any leftover dal for this recipe.
I usually boil extra dal for dinner to prepare dal paratha the next day for breakfast or lunch.
The consistency of the dal should be thick. The idea is to include more protein than carbs. Add flour just enough to bind the dal well.
How to make Dal Paratha –
Mix dal with enough flour to help it bind well. Add finely chopped onions, coriander leaves, carom leaves, salt, green chilli, turmeric powder and red chilli powder. Mix well. Add water if required.
Mix well to make a soft dough. Apply ghee/oil and let it rest for 10 – 15 mins. Divide the dough into small balls of equal size. Roll out, apply ghee and give it the desired shape. Cook on both sides till done.
More paratha recipes from my kitchen –
Peas Paratha
Leftover roti cutlet
How to serve Dal Paratha –
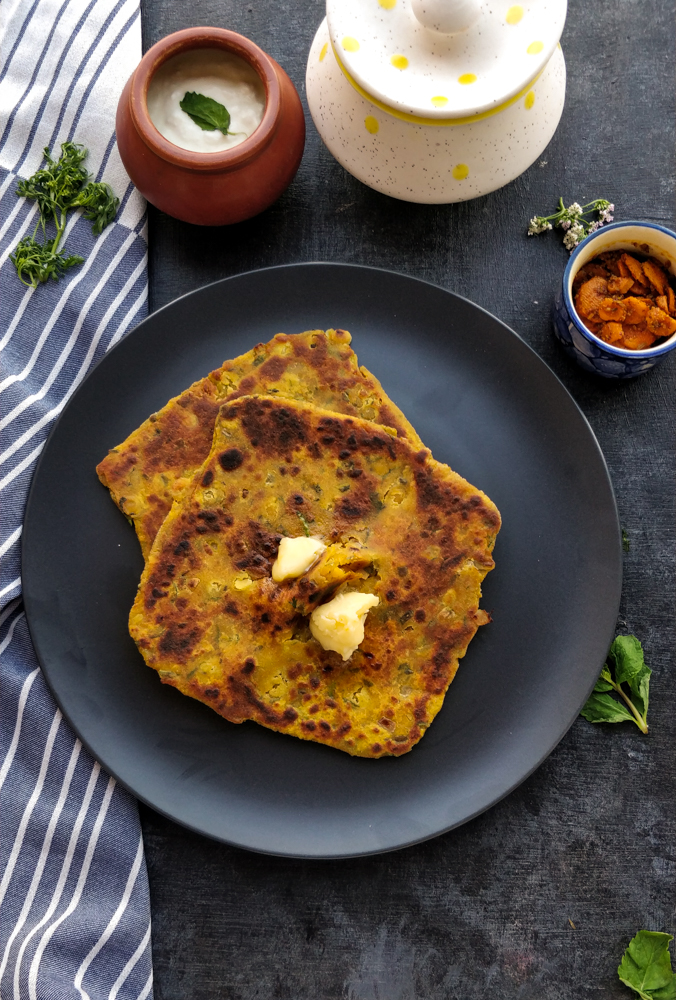
Dal Paratha is a wholesome dish in itself. I like to serve it with curd and pickle. You can also serve it with vegetable of your choice. It goes well with tomato chutney and lime pickle as well.
Things to keep in mind while making Dal ka Paratha –
1. Make sure to keep the dough soft.
2. Let the dough rest for at least 15 mins and knead again to smooth for 5- 10 minutes. This will ensure soft parathas.
3. Maintaining temperate of the tawa is a crucial part. Cook it on a high flame, on both sides. Lower the flame while applying ghee and cook till crisp.
4. Use a spatula to press from one side, this will make parathas crispier.
5. Apply a generous amount of ghee while making parathas. That’s the key. 😀
Step by step recipe of Dal Paratha –
• In a mixing bowl add boiled dal. You can also use leftover dal.
• Add whole wheat flour, finely chopped onion, salt, coriander leaves, carom leaves, green chilli, turmeric powder and red chilli powder.

• Mix everything well together.

• Knead a soft dough, adding water in batches.
• Give a generous coat of ghee, cover and let it rest for 15 – 20 mins.


• Once the dough is well rested, knead again till smooth.
• Make equal sized balls from the dough.

• Roll out the dough, apply ghee and give a shape of your choice.

• Roll out using dry flour.

• On a preheated tawa, cook parathas on both sides.

• Apply ghee and cook till crisp.

• Serve hot.
If you try this recipe please do let me know in the comment section. I would be happy to receive your feedback on my Social Media channels – Instagram, Facebook, Twitter
You can also pin this recipe on Pinterest for later referral.
Please do Subscribe to myYoutube Channel for updates on video recipes.
Dal Paratha
Ingredients
- 1 Cup Whole Wheat Flour
- 1.5 Cups Boiled Dal (Thick)
- 1/2 Cup Finely Chopped Onion
- 2 Tbsp Coriander Leaves
- 1 Tbsp Carom Leaves (Ajwain) You can also use carom seeds instead
- 1 Tsp Green Chilli
- 1 Tsp Turmeric Powder
- 1 Tsp Red Chilli Powder
- Salt to taste
- Water as required
- Ghee/Oil
Instructions
- In a mixing bowl add boiled dal. You can also use leftover dal.
- Add whole wheat flour, finely chopped onion, salt, coriander leaves, carom leaves, green chilli, turmeric powder and red chilli powder.
- Mix everything well together.
- Knead a soft dough, adding water in batches.
- Give a generous coat of ghee, cover and let it rest for 15 – 20 mins.
- Once the dough is well rested, knead again till smooth.
- Make equal sized balls from the dough.
- Roll out the dough, apply ghee and give a shape of your choice.
- Roll out using dry flour.
- On a preheated tawa, cook parathas on both sides.
- Apply ghee and cook till crisp.
- Serve hot.
Video
Notes
- You can also use oil instead of ghee for frying parathas but ghee or butter is suggested.
- Keep in check the temperature of tawa and regulate it from high to low flame as required. It should neither be too hot to burn the parathas or too cold.
- Adjust spices as per taste.
- Resting dough is very important as it absorbs the water content properly and becomes smooth.
- Smooth and soft dough makes good parathas as it helps in spreading easily.
- Cook on a high flame and lower the flame immediately after applying ghee and fry parathas pressing them gently to get crisp crust.


